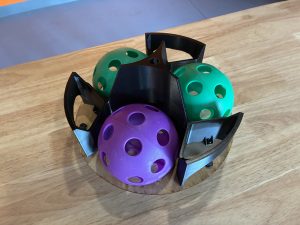
The 2025–26 FTC season introduced a game titled Decode, where robots are tasked with collecting 5-inch wiffle balls and launching them into a raised goal. One of the biggest challenges teams faced was consistently aiming their shooting mechanism at the target.
Some teams chose to aim manually, but this approach was often slow, inconsistent, and highly dependent on driver skill. Other teams implemented automatic aiming using either AprilTag vision tracking or odometry. In this article, we’ll explore how to build an auto-aiming system using odometry, with a focus on reliability, speed, and repeatability during TeleOp.
Why Use Odometry?
Odometry uses sensors to track a robot’s precise location on the field, including both position and heading. A common FTC implementation uses dead wheels—non-powered omni or mecanum wheels that remain in constant contact with the field and rotate as the robot moves. Encoders attached to these wheels measure rotation, which can be converted into distance traveled and direction.
By continuously tracking these movements, the software estimates the robot’s current pose, defined as its x-position, y-position, and heading (orientation).
When properly tuned, odometry can be extremely accurate—even over the course of an entire 2½-minute match. Dedicated odometry processors can be even more precise, as they sample encoder and IMU data at a higher frequency than the main robot controller. One FTC-legal example is the goBILDA Pinpoint Odometry Computer, which uses two dead wheels combined with an internal IMU to provide accurate pose estimates.
Pathing Libraries
Teams using odometry are strongly encouraged to pair it with a pathing library such as Road Runner or Pedro Pathing. While these libraries are commonly associated with autonomous routines, they are equally powerful during TeleOp for:
- Tracking real-time robot position
- Automating short paths
- Enabling features like auto-aim and auto-alignment
Both libraries require programming in Java, typically using Android Studio.
For TeleOp auto-aiming, it’s important to preserve your robot’s pose between Autonomous and TeleOp. Otherwise, TeleOp will start without knowing the robot’s actual location on the field. This is commonly handled using static variables to store the final Autonomous pose and reinitialize it at the start of TeleOp.
// Example pose storage between Auton and TeleOp
public class PoseStorage {
   public static Pose2d currentPose = new Pose2d(0, 0, 0);
}
Using Trigonometry to Find Distance and Angle
Once we know the robot’s current pose from our pathing library, we can use basic trigonometry to calculate both the angle and distance to the goal. The following example will use the game from the 2025-26 FTC season, titled “Decode”, the field coordinates from Pedro Pathing, and assumes that your team is on the Blue Alliance.
Understanding the Coordinate System
Pedro Pathing uses a right-hand coordinate system, which differs from the FTC SDK’s standard coordinate layout. All units are measured in inches:
- (0, 0) represents the front-left corner of the field
- (144, 144) represents the back-right corner
For a detailed explanation, refer to the Pedro Pathing coordinate system documentation.
Defining the Target
For the Blue Alliance, we can represent the target as some point within the triangular goal. For this example, we’ll use (x:10, y:138). From odometry, we’ll know the x and y position of our robot, so we can easily determine our robot’s x-offset and y-offset from the goal. As seen in the diagram below, this can be represented as a simple triangle.
From odometry, we already know the robot’s current x and y position. This allows us to calculate the horizontal and vertical offsets between the robot and the target, forming a right triangle as seen in the diagram below.
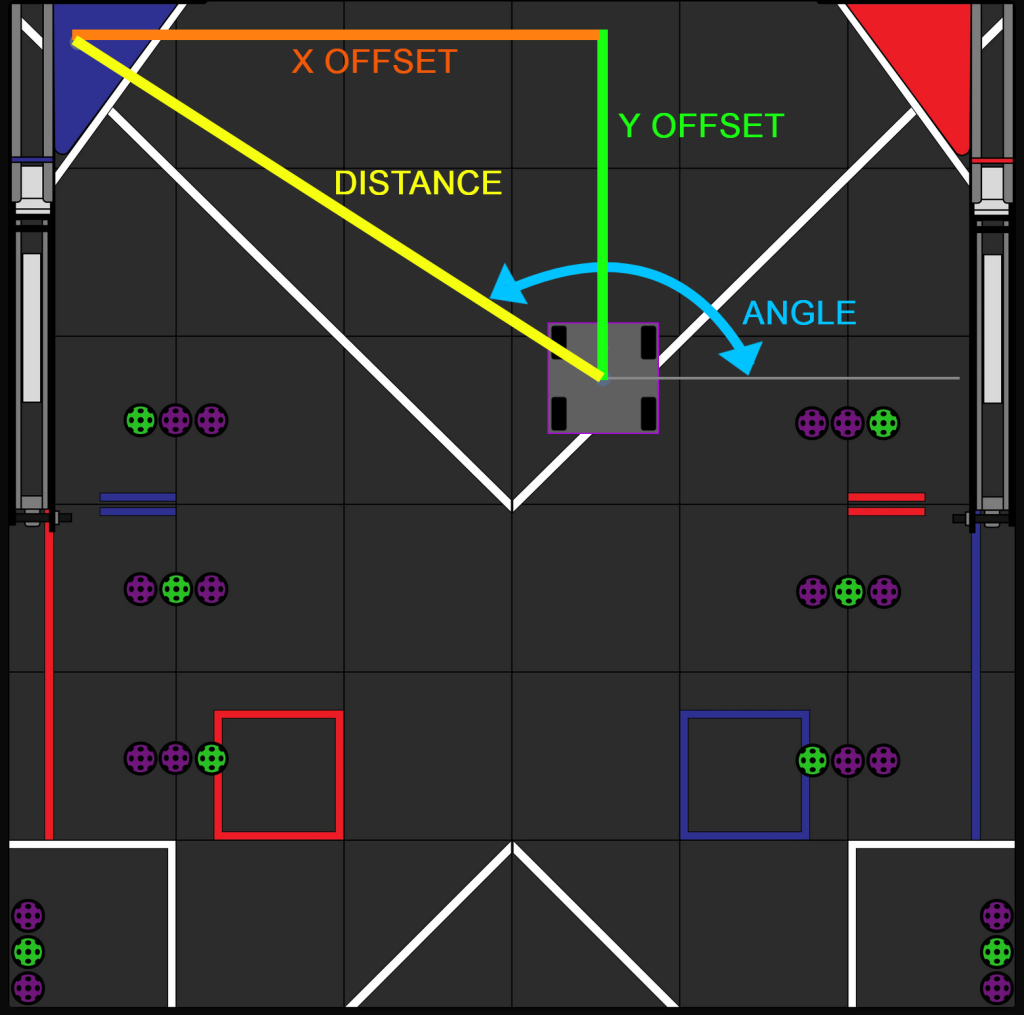
Diagram 1: Decode game field showing distance and angle to goal. Credit to Pedro Pathing Visualizer
Calculating Angle
As you may remember from Trigonometry, the “tan” function can be used to relate the angles of a right triangle to the ratio of its opposite and adjacent sides.
tan(angle) = opposite / adjacentWe can find the required angle using the inverse tangent function:
angleToTarget = atan2(yOffset, xOffset)The atan2 function is preferred because it automatically handles quadrant corrections.
Calculating Distance
To calculate the distance to the goal, we use the Pythagorean Theorem:
distance = sqrt(xOffset² + yOffset²)This distance can later be used to adjust shooter velocity, flywheel RPM, or launch angle.
Code Example
While auto-aiming can be implemented using Blocks, most teams pursuing odometry-based solutions will be using Java with Android Studio, as this is required for both Pedro Pathing and Road Runner.
The code snippet below uses Java and Pedro Pathing to compute distance and angle from the robot to the goal.
//Get the robot's current pose from odometry
Pose2d robotPose = drive.getPose();

//Define goal's position
double targetX = 10;
double targetY = 138;

//Calculate x/y offsets from goal
double xOffset = targetX - robotPose.getX();
double yOffset = targetY - robotPose.getY();

//Determine angle/distance to goal
double angleToTarget = Math.atan2(yOffset, xOffset);
double distanceToTarget = Math.hypot(xOffset, yOffset);
Final Thoughts
The next step in developing a complete auto-aiming system is using these calculated values to rotate your robot or turret toward the target and launch the game element with the correct speed and loft. Since shooter designs vary widely, those implementation details are beyond the scope of this article.
Vision-based auto-aiming is also a viable approach. Many teams successfully used cameras such as the Limelight 3A to track the AprilTag mounted on the goal, allowing the robot to aim and estimate distance simultaneously. Our team began the season using vision but ultimately found that odometry-based auto-aiming was faster, more responsive, and more consistent, especially during high-speed TeleOp gameplay.
Used correctly, odometry can be a powerful tool—not just for autonomous routines, but for advanced TeleOp features that give your team a competitive edge.